
Copyright ©1995 by NeXT Computer, Inc. All Rights Reserved.
| 4 |
The Edit Application
|
| In addition to the standard UNIX editing tools (vi, ex, ed, and GNU Emacs), the NEXTSTEP development environment provides a mouse-based text editor named Edit for creating and editing ASCII or RTF (Rich Text Format®) text files.
Edit has all the standard features of a text editor: You can type paragraphs of text without pressing the Return key (the text wraps automatically at the end of each line, and if you change fonts or resize the window, the text rewraps accordingly). You can use the mouse to select where text will be entered and to select text you want to edit. And you can find and replace text, move and copy it, and so on. While Edit has the functionality of a good text editor, it's particularly suited for writing programming code and performing other application-development tasks. It lacks many of the capabilities found in similar applications, but it has many features specifically designed for programmers. For example, Edit supports name expansion, folder browsing, block nesting in program listings, and a structured editing facility. It also provides interapplication functionality with Project Builder, Terminal, and the GDB debugger. |
| Starting Edit |
| You can start Edit from the workspace as you would start up any other application. Alternatively, you can start up Edit from a shell window by typing the following command at the UNIX prompt:
Several command-line options allow you to override various default characteristics of Edit for the work session you're about to start--characteristics such as the number of lines and columns in new windows, the font family used, and the font size. For example: |
![]() Edit -NXFont Times-Roman Fruit.m &
Edit -NXFont Times-Roman Fruit.m &
| These command-line options can be specified in any order, as long as they precede any file names. Several options are listed below. |
| Option | Effect | |
| IndentWidth | Specifies the width of indentation for block nesting. The default value is 4. | |
| NXFont | Specifies the font family. The default font is Helvetica®. | |
| NXFontSize | Specifies the font size, in points. The default value is 12. | |
| Tags | Specifies one or more pathnames to tags files that will be searched by the Source command. The pathnames should be separated by a colon, as in a standard UNIX path list. The default is "tags," which indicates that the tags file in the current folder will be searched. See the description of using tags files under "Interacting with UNIX" later in this chapter for more information about using tags files in Edit. | |
| DeleteBackup | Specifies whether the previous version of a file is deleted or retained as a backup when you save changes to the file. The default value is YES, which means that the previous version is deleted. If the previous version is saved as a backup, its name is the same as the original file name, but with a tilde (~) appended to the name. | |
| NXMenuX | Specifies the (positive) distance in pixels from the left edge of the screen to the left edge of the main menu. | |
| NXMenuY | Specifies the (positive) distance in pixels from the bottom of the screen to the top of the main menu. |
| Edit will use the default value for each option unless you override it with a command-line option. The value specified in the command line will remain in effect only for the work session you're about to start. The next time you use Edit, the defaults will go back into effect.
You can set new default values for each of the above characteristics (except for screen coordinates) using the Preferences panel, which is described in the following section. Most defaults set with the Preferences panel remain in effect until you change them. |
| Setting Preferences |
| The Preferences command in the Info menu displays the Preferences panel, shown below. The Preferences panel lets you set default values for various Edit options. For example, you can set default font properties or specify the size of new windows. |
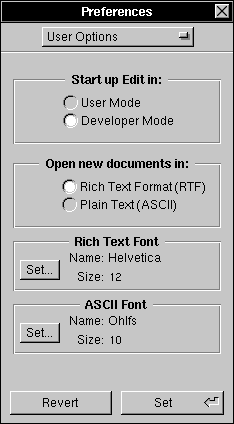 |
| Enter values and click buttons to specify new preferences, as described below. Then click Set to set the new preferences (or click Revert to restore the previous settings). In general, the new settings remain in effect until you change them. However, you can temporarily override some of the defaults by starting up Edit from a shell window and specifying one or more command-line options (as described earlier under "Starting Edit"). |
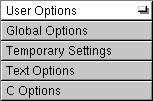 |
| You can press the button labeled User Options and, in the list that appears, choose from several other sets of options that are available. These other options are described below, after the user options.
User Options Choose User Options in the Preferences panel's pop-up list to see the user options that can be specified. User options are saved in your defaults database and continue to be used until you specify different values for them. |
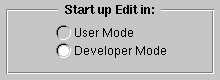 |
| By default Edit starts up in User mode, which presents just a subset of the commands available in Developer mode. If you're using Edit for application development be sure to click the Developer Mode button. |
 |
| Click one of these buttons to specify whether new documents are created in RTF (Rich Text Format) or ASCII format.
Tip: After you've created or opened a document, you can change its format by choosing the Make Rich Text command or the Make ASCII command in the Text menu. |
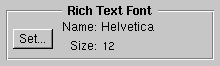 |
| Click the Set Button in the Rich Text Font field to set a default font for Edit windows that are in RTF format. Specify the font family, typeface, and size in the Font panel that appears, and click the Set button in the Font panel when you're done. After you save these settings, all subsequently created RTF documents will by default display text in the specified font. |
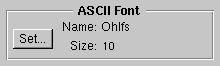 |
| Click the Set Button in the ASCII Font field to set a default font for Edit windows that are in ASCII format. Specify the font family, typeface, and size in the Font panel that appears, and click the Set button in the Font panel when you're done. After you save these settings, all subsequently opened Edit windows that containing ASCII files will display text in the specified font.
Tip: When working with code or UNIX command output, it's best to use a fixed-width font family, such as Courier.
Global Options Choose Global Options in the Preferences panel's pop-up list to see the global options that can be specified. Global options are saved in your defaults database and continue to be used until you specify different values for them. |
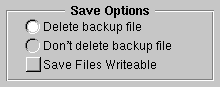 |
| When the "Delete backup file" option is selected, Edit automatically deletes the previous version of a file when the current version is saved. Click "Don't delete backup file" to retain the previous version of a file when you save the current version (if the previous version of a file is saved). This backup file is saved under the original file name, but with a tilde (~) appended to the name.
If you try to save a file that's write-protected, you can do so by responding affirmatively to the confirmation panel that appears (as long as you own the file). Check the Save Files Writeable button if you want such write-protected files to lose their write-protected status when they're saved. |
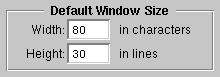 |
| To set a default size for Edit file windows, enter a width (in number of characters) in the Width field and a height (in number of lines) in the Height field. Edit files that you open after saving these settings will be displayed in windows with the dimensions you specify. (Note that since these dimensions are specified in characters and lines, the default window size will be affected by the default font.) |
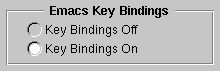 |
| Click one of the buttons in the Emacs Key Bindings field to specify whether or not Emacs key bindings are enabled. For a list of the Emacs key bindings available in Edit, see "Using Keyboard Editing Commands."
Temporary Settings Choose Temporary Settings in the Preferences panel's pop-up list to see the temporary settings that can be specified. These are called temporary settings because they're not saved in your defaults database. |
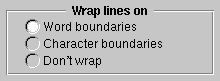 |
| When the "Word boundaries" option is selected, text wraps onto the following line at the end of each full line, but no words are split across lines. Clicking "Character boundaries" also causes text to be wrapped at the end of each line, but words can be split across lines. Clicking "Don't wrap" causes text to not wrap at all. |
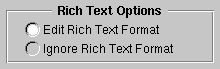 |
| When the Edit Rich Text Format option is selected, RTF files that you open are displayed as formatted text. Click Ignore Rich Text Format to view RTF files as unformatted text with the format commands visible. Because other applications use Edit to view formatted text, you should normally leave the Edit Rich Text Format option selected.
Text Options Choose Text Options in the Preferences panel's pop-up list to see the text options that can be specified. Text options are saved in your defaults database and continue to be used until you specify different values for them. |
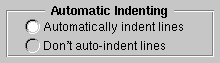 |
| When the "Automatically indent lines" option is selected, Edit indents each new line the same as the line above it (automatic indentation is useful for typing indented lines of code). Click "Don't auto-indent lines" if you want each new line to start at the left margin. |
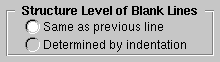 |
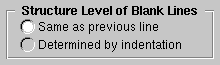
| When the "Same as previous line" option is selected, Edit assigns each "blank" line (that is, each line that contains no visible text) the same structure level as the previous line. Click "Determined by indentation" if you want the structure level of blank lines to be determined by the amount of indentation (that is, tabs and spaces) on that line, rather than by the indentation of the previous line. |
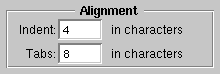 |
| In the Indent field, enter the number of characters you want to shift right or left with the Text menu's Nest and Unnest commands. In the Tabs field, enter the number of characters you want between tab stops. |
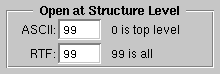 |
| In the ASCII and RTF fields, enter a number between 0 and 99 to specify how many levels of structure will be visible in a newly opened file of that type. A 0 indicates that only the top level of text (that is, text that's flush left) will be visible, a 1 indicates that the first sublevel of text should also be visible, and so on. |
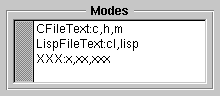 |
| In addition to the default Text mode, there are two editing modes for C and Lisp source files (these modes optimize some minor aspects of Edit's behavior for use with each of these programming languages). You can specify in the Modes field any additional file extensions that you want associated with either of these two modes.
C Options Choose C Options in the Preferences panel's pop-up list to see the C source code options that can be specified. C options are saved in your defaults database and continue to be used until you specify different values for them. |
 |
| When the "Independent of 1st character" option is selected, commands in the Structure menu operate solely on the basis of indentation, independent of particular characters. Click "Determined by 1st character" if you want Structure menu commands to treat C preprocessor directives (lines whose first character is #) specially--that is, as second-level text, rather than top-level. |
 |
| When the "Same as previous line" option is selected, Edit assigns each "blank" line (that is, each line that contains no visible text) the same structure level as the previous line. Click "Determined by indentation" if you want the structure level of blank lines to be determined by the amount of indentation (that is, tabs and spaces) on that line, rather than by the indentation of the previous line. |
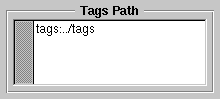 |
| In the Path field, enter the pathname of one or more tags files that you want Edit to search when you choose the Source command in the Utilities menu. A tags file, which you create using the UNIX ctags command, contains the locations of program object definitions among a given group of files. The Source command searches the tags files specified here for the location of an object definition and then opens the file containing the definition.
If you leave the default entry of "tags:../tags" in this field, Edit will search only the tags files in the current folder (the folder containing the file in the main window) and in the current folder's parent folder. You can replace or add to the default, however, by entering the pathnames of one or more other tags files; you separate multiple pathnames with a colon as in a standard UNIX path list. See the description of the Source command in "Commands in the Utilities Menu" later in this chapter for more information about using Edit's Source command with tags files. |
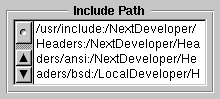 |
| The Include Path field displays your default include path (the path the preprocessor uses to search for system header files). You can redefine this path by editing the text and then clicking the Set button. |
| Performing Basic Operations |
| This section summarizes several basic Edit concepts and operations. For more information about basic operations common to Edit and other standard NEXTSTEP applications, see the User's Guide.
Opening Edit Files In addition to opening Edit files from the workspace, you can open them from within Edit by using the Open or Open Selection commands in the File menu. (These commands are described later in the chapter.) An alternate way to open one or more files is to use Edit's openfile command at the UNIX prompt in a shell window. You can specify one or more file names (or pathnames), which are interpreted relative to the shell window's current folder. For example, the following command would open all the files in the current folder that end with a ".c" extension, plus all the files in a subfolder called headers that end with a ".h" extension: |
![]() openfile *.c headers/*.h
openfile *.c headers/*.h
| Each file is opened in its own Edit window. Note that the openfile command can be used only when Edit is running.
Using File Windows and Folder Windows Edit provides two types of standard windows: file windows and folder windows. As in other applications, there are also panels and menus. Note: Unless otherwise specified, folder windows mentioned in this chapter are Edit folder windows, not Workspace Manager folder windows. An Edit file window displays a document file that you can view and edit. When you make changes to text displayed in a file window, the version of the file on the disk isn't affected until you save the file with the File menu's Save command. When a file contains unsaved changes, the window's title bar displays a partially drawn close button. If you miniaturize a window containing unsaved changes, its miniwindow is highlighted in gray. An Edit folder window displays a list of the files and subdirectories contained in a folder. You don't edit the contents of a folder window; instead, you use the displayed folder listing to find and select other files or directories to open. Two special features are available in Edit folder windows: |
| You can type a character to find and select the first item starting with that character. Each additional character you type deselects the previously selected item and finds the first item starting with the newly typed character. The commands in the Find menu can also be used to find and select items in a folder window. | ||
| You can double-click a file or folder name to open an Edit window displaying that file or folder. This is equivalent to selecting the name and choosing the Open Selection command in the File menu. |
| You can also open an Edit folder window by choosing the Open Folder command in the File menu. The command displays a panel in which you enter the pathname of a folder to be opened.
Selecting Text Most operations in Edit are performed on the current selection, which appears either as the insertion point (a blinking vertical bar) or as highlighted text. You make selections using the standard selecting techniques: Position the insertion point by clicking, and select a block of text either with multiple-clicks or by dragging with the mouse, as outlined below. |
| Method | Effect | |
| Clicking | Positions the insertion point where you click. | |
| Dragging | Selects text that you drag across. To select beyond what's currently displayed, drag past the edge of the window. The contents scroll automatically and text continues to be selected. | |
| Shift-clicking | Selects from the insertion point, or extends or shortens a selection. | |
| Double-clicking | Selects a word. If you double-click one of a pair of matching delimiters (parentheses, braces, or square brackets) the pair of delimiters and the enclosed text are selected. | |
| Triple-clicking | Selects a line or paragraph. |
| Finding and Replacing Text
The Find Panel command opens a panel that lets you locate the next occurrence of a specified text string and optionally replace it with another string. |
 |
| In the Find field, specify the text to be located. You can't type tab or return characters in the Find field, because of their other functions: Pressing tab moves the insertion point to the "Replace with" field, and pressing Return begins the search for the text. To specify a tab character in the text, type Alternate-Tab. Likewise, type Alternate-Return to specify a carriage return character.
In the "Replace with" field, you may specify a replacement string. Then click one of the panel's buttons to perform the exact search operation you want, as described below. If the end of the document is reached during a search, Edit continues searching from the beginning of the document. When searching backward and reaching the beginning of the document, Edit continues searching from the end. |
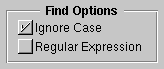 |
| When Ignore Case is checked, Edit doesn't distinguish between uppercase and lowercase letters when finding a match during the search. If Ignore Case is not checked, the search is case-sensitive.
If the Regular Expression box is checked, Edit interprets the text in the Find field as a UNIX regular expression (see the UNIX manual page for ed for information on regular expressions). If this box is unchecked, the Find entry is taken as a literal string of text. |
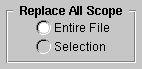 |
| The Replace All Scope options specify whether Replace All applies to the entire document (Entire File) or only to the current text selection (Selection). |
| In the area that you specify, the Replace All button replaces all occurrences of the text entered in the Find field with the text entered in the "Replace with" field. If the "Replace with" field is blank, Replace All deletes all occurrences of the text. After a search with Replace All, the Find panel reports the number of occurrences that were replaced. |
| After text has been found, click Replace if you want to replace the current selection with the text in the "Replace with" field (or if the "Replace with" field is blank and you want to delete the current selection). |
| Click this button to replace the current selection and find the next match. This button is a shortcut to using the Replace button and then the Next button. |
| Click the Previous button to find the first occurrence of the Find entry searching backward from the insertion point or the beginning of the current text selection. |
| Click the Next button to find the first occurrence of the Find entry searching forward from the insertion point or from the end of the current selection. (Pressing the Return key has the same effect, but with one difference: If you used the Find Panel command's keyboard alternative to display the panel, pressing the Return key causes the panel to disappear instead of remaining on the screen.)
Checking Spelling |
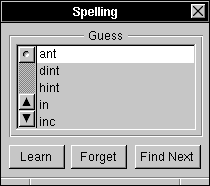 |
| The Spelling command opens a panel that lets you check the spelling of words, choose from possible corrections, and modify the spelling dictionary. As a convenience, Edit doesn't open the Spelling panel as the key window, so that you can type to correct a misspelling without having to click in the file window first.
To begin a spelling check from this panel, click Find Next. Spelling locates and selects the next word not contained in the spelling dictionary. (Edit uses a systemwide 100,000-word spelling dictionary that's shared by other applications, such as Mail.) The search for misspelled words is circular, so that all the text in the main window is searched. The search starts at the word containing the insertion point, or at the last word in the current selection, and goes to the end of the text. If no potentially misspelled words are found, the search continues at the beginning of the text until it comes back to the starting point. The Spelling panel displays a list of possible corrections to the last word selected as misspelled (unless the word is completely unrecognizable). Double-clicking one of them will replace the selected word in the main window with the desired correction. |
| The Learn and Forget buttons let you remove or add words from the spelling dictionary. If a correctly spelled word is identified as misspelled, you can add it to the dictionary by clicking Learn. You can also remove any word you've added to the dictionary, by selecting it and clicking Forget. |
| To search for the next misspelled word, click Find Next (or choose the Check Spelling command from the menu). |
| Contracting and Expanding Text in a File Window |
| Edit provides a Structure capability that lets you quickly move around in C files (as well as in any other type of file where levels of structure are represented by varying degrees of indentation--outlines, for example). Commands in the Structure menu can be used to "contract" text in the main window, displaying only the text at a particular level of indentation. Text that's indented beyond that level is hidden. Figure 4-1 shows a document that's been contracted--only the top-level lines (those that are flush left) are visible. Notice the two white text arrows, which indicate the presence of contracted text. |
 |
| Figure 4-1. File Window with Just First-Level Text Expanded
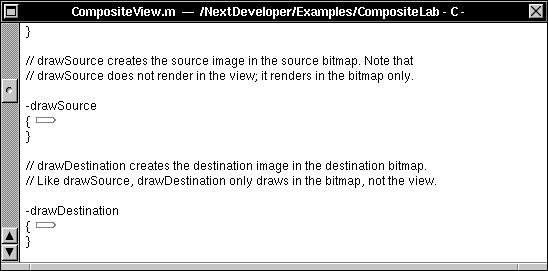
When text is contracted, only the display is changed--the document itself (including font changes and text properties) remains unchanged. However, while some Edit commands affect both the expanded and the contracted portions of the document (for example, Cut and Paste), other commands affect only the portions of the document that are expanded (for example, commands that change the font). Commands in the Structure menu let you expand or contract either the entire contents of the window, or just the current selection. The rest of this section describes some mouse shortcuts that you'll probably use even more frequently than the menu commands. Clicking a text arrow expands (that is, displays) the text that the arrow represents. Control-clicking a text arrow expands just the top level of the text that the arrow represents. For example, Figure 4-2 shows what the drawSource definition looks like after Control-clicking the first of the two text arrows shown in Figure 4-1. Notice that the drawSource definition has expanded, but the drawDestination definition is still contracted. Also notice that the drawSource definition hasn't expanded completely--the switch statement contains yet another level of contracted text. |
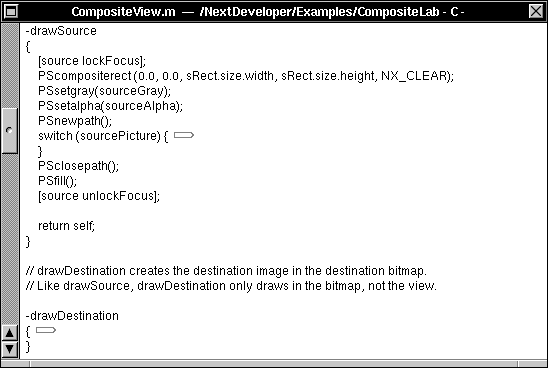 |
| Figure 4-2. File Window with Some Second-Level Text Expanded
Figure 4-3 shows the drawSource definition after Control-clicking the switch statement's text arrow. Each case statement in the switch contains an additional level of contracted text. The text for CIRCLE, however, isn't contracted--it's already been expanded by clicking (or Control-clicking) its text arrow. |
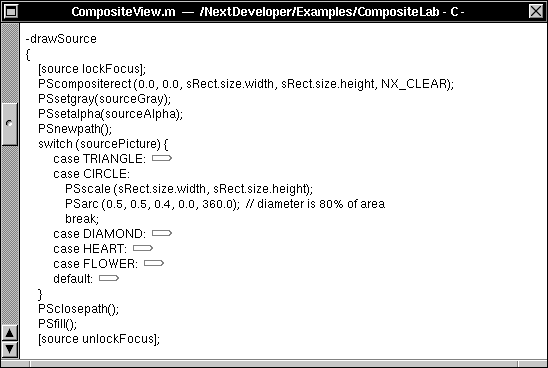 |
| Figure 4-3. File Window with Some Third-Level Text Expanded
If you want to recursively expand all the sublevels of text represented by a text arrow, click the arrow instead of Control-clicking it. Control-clicking anywhere within an indented block of text contracts the text. |
| Using the Ruler |
| Edit provides a ruler that can be used to alter the format (margins, indentation, and tab stops) of text in a file window. The Text menu (a submenu of the Format menu) contains commands for showing the ruler and copying ruler settings, as well as commands for centering or otherwise aligning text between the margins. |
| To display the ruler, choose the Show Ruler command from the Text menu (this command is enabled only if the file window contains text in RTF format). The ruler settings show the format of the paragraph that contains the insertion point or the beginning of the selected text.
You can move margin, indentation, and tab markers by dragging them along the scale of the ruler. When you move a marker in the ruler, a vertical gray line appears, running from the marker to the bottom of the window. This line makes it easier for you to determine the position of the marker relative to the text. There are two important things to note about the margin settings: |
| The left and right margin settings affect the entire text. Thus the margin settings, whatever they may be, will always be uniform throughout a file. | ||
| The right margin adjusts to match the width of the window: If you resize the window wider, the right margin marker moves to the right and the lines of text become longer; narrowing the window moves the right margin marker to the left. |
| Tab stops and indentation may be customized for individual paragraphs. Unless you specifically change the tab stops and indentation, each new paragraph you type will have the same tab stops and indentation as the preceding one. If you move or copy a paragraph (including the Return at the end of it), the paragraph will keep its original tab stops and indentation.
If you want to change the tab stops or indentation of a single paragraph, you need only click in the paragraph; you don't have to select the entire paragraph. After you make your changes, the paragraph becomes selected. When you're ready to type again, just position the insertion point where you want to enter text. When several paragraphs are selected, the ruler displays the format of the first one. If you then change a ruler setting, the selected paragraphs will receive not only that ruler setting, but all the formatting of the first paragraph. You can also copy the format of one paragraph to other paragraphs with the Copy Ruler and Paste Ruler commands in the Text menu. Note: If you copy formatted text from Edit into another application, the formatting will be copied along with the text only if the application can interpret RTF.
Margins The margin markers determine the left and right margins of the entire Edit file. To set the left or right margin, drag the corresponding margin marker to the desired position on the ruler. As you drag the left margin marker, the tab and indentation markers move with it, remaining the same distance relative to the left margin.
Indentation There are two indentation markers: |
| The first-line indentation marker indents the first line of a paragraph. | ||
| The body indentation marker indents all the rest of the lines of the paragraph. |
| The two indentation markers move independently; adjusting one does not affect the other. Initially, both indentation markers are aligned with the left margin marker. Neither indentation marker can be moved to the left of the left margin marker.
The relative positions of the two indentation markers determine the style of paragraph indentation: |
| Dragging the first-line indentation marker to the right of the body indentation marker creates a regular paragraph indentation. | ||
| Dragging the first-line indentation marker to the left of the body indentation marker creates a hanging indent. | ||
| Dragging both the first-line and the body indentation markers to the same position indents the entire paragraph. |
| Changing the left margin of the text doesn't affect indentation. Both indentation markers move with the left margin marker, maintaining the same distance from it.
Tabs Tab markers set the locations of tab stops--the positions that the insertion point will advance to if you press the Tab key. Typing proceeds normally (from left to right) after the tab, which lets you align columns of text vertically along the left side. Initially, the ruler displays ten tab markers set eight spaces apart. Note that these initial tab markers may not line up exactly with the calibration marks on the ruler's scale. To reposition a tab stop, drag the tab marker to the desired position on the ruler. To create a new tab marker, click below the scale of the ruler: The marker will appear on the ruler above where you clicked. You can remove a tab marker by dragging it off the left or right end of the ruler. Like indentation, tab stops adjust accordingly when you move the left margin marker. |
| Adding Linked Graphics |
| You can add linked graphic images to an Edit document, so that whenever the original images are modified, the linked copies you added can be updated automatically.
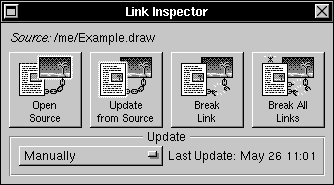
To link graphics from another application into Edit, the application used to create the graphic image must be able to supply linked information. The Draw application (in /NextDeveloper/Demos) is an example of such an application. (Some applications can supply linked information that isn't a graphic image, such as text or database information. You add this information to a document in the same way that you add linked graphics.) To paste a linked graphic in an Edit document, copy the graphic in the source application and then choose the Paste and Link command in Edit's Link menu. The Link Inspector command (also on the Link menu) opens the following panel, which you use to maintain and update the links you create. Using this panel you can open the source document, update the linked graphic, break the selected link, or break all links. In addition, you can specify how to update the link when changes to the source graphic occur. |
 |
| For more information about working with linked graphics, see Chapter 11, "Working with Graphics," in the User's Guide. |
| Adding Help Links |
| The Help menu in Edit provides commands that are used to add or edit Help links. Although Help links are designed for use within an application's on-line Help system, they can also be used more generally (for example, the Contents file for the on-line developer release notes contains links to the various release note files). For information about adding a Help system to an application you're developing, see Chapter 3.
To work with Help links and markers, use the following commands in the Help menu (choose the Help command in the Format menu): |
| Choose Insert Link to insert a Help link at the current insertion point. In the Link Inspector that appears, specify the name of a file and (optionally) a marker in that file. | ||
| Choose Insert Marker to insert a Help marker at the insertion point in the main window. A Marker panel appears in which you specify a name to associate with the marker. When you insert a link to the marker, you'll identify it by this name. | ||
| Choose Show Markers to show all the markers in the main window, or Hide Markers to hide them. |
| If you want to edit a link or marker you've created, Command-click it to bring up the Inspector panel. To delete a link or marker, select it and press the Delete key, just as you would with text. |
| Using Templates |
| Three commands on the Expert menu--Expansion Dictionary, Insert Field, and Next Field--let you for create and use glossary entries. Glossary entries are abbreviations for commonly used text strings or templates that you can type and then expand into the full text entry with a single keystroke.
To define a glossary entry, open the Expansion Dictionary panel by choosing Expansion Dictionary in the Expert menu. |
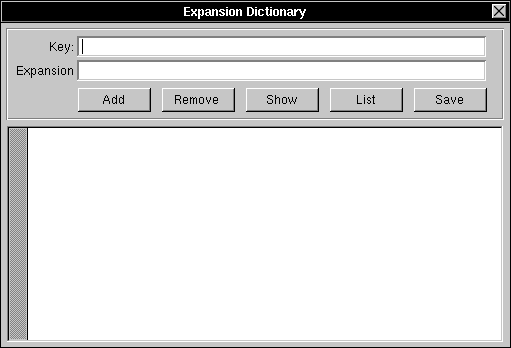 |
| In the Key field, enter an abbreviation for the text string or template. In the Expansion field, enter the expanded text that you want the abbreviation to represent. If you want the expansion to occupy more than one line, press Alternate-Return while typing in the Expansion field to insert Return characters between lines. Note that when you press Alternate-Return, the line of expanded text you just typed disappears from the field, leaving room to type the next line.
To use a glossary entry, type the abbreviation in a document and then press the Escape key; the abbreviation is replaced by its expansion. For example, if you frequently need to type setOutputForm, you could use the Expansion Dictionary command to associate the abbreviation "sof" with the longer declaration. To enter setOutputForm, you would only have to type sof and press Escape. The abbreviation doesn't even have to be typed in full for the expansion to occur, as long as what you do type refers unambiguously to a glossary entry. If you're using the Expansion Dictionary window to create a template containing fields you'll be editing after the text is expanded, surround each field with European quotes («»), as described below. For example: |
![]() Subject: «subject»
Subject: «subject»
![]() To: «recipient»
To: «recipient»
![]() cc: «cc»»
cc: «cc»»
![]() «message»
«message»
| You can enter European quotes in the Expansion field by choosing the Insert Field command, or you can enter them directly from the keyboard by typing Alternate-( and Alternate-). After inserting the template into a document, you can quickly find each editable field by choosing the Next Field command, which positions the insertion point at the next field in the template. |
| After entering the abbreviation and the expanded text it stands for in the Key and Expansion fields, click the Add button to accept the new glossary entry. |
| Then to actually save the entry (so that it's there for the next work session), click Save. |
| To remove a glossary entry, type its abbreviation in the Key field and click the Remove button. |
| You can view the expanded text associated with an abbreviation by entering the abbreviation in the Key field and then clicking Show. |
| Click List to view a list of all available glossary entries. |
| Using Keyboard Editing Commands |
| In addition to letting you edit text using menu commands (and their keyboard equivalents), Edit also supports several Emacs-style editing commands that can be typed from the keyboard. The table below lists the key combination corresponding to each of these commands and a description of what the command does. |
| Command | Action | |
| Control-B | Moves back one character | |
| Control-F | Moves forward one character | |
| Alternate-b | Moves back one word | |
| Alternate-f | Moves forward one word | |
| Control-A | Moves to beginning of line | |
| Control-E | Moves to end of line | |
| Control-D | Deletes next character | |
| Control-H | Deletes previous character | |
| Alternate-d | Deletes to end of current (or next) word | |
| Alternate-h | Deletes to beginning of current (or previous) word | |
| Control-K | Deletes forward to end of line | |
| Alternate-< | Moves to beginning of text | |
| Alternate-> | Moves to end of text | |
| Control-N | Moves down one line | |
| Control-P | Moves up one line |
| Interacting with UNIX |
| Edit provides some useful commands for using UNIX utilities from within Edit. These include: |
| Two commands for piping output from UNIX commands directly into Edit files | ||
| A Source command that you can use with one or more tags files to locate program objects in a group of files |
| Piping UNIX Output to a File
Edit lets you pipe the output of a UNIX command directly into an Edit window. This is a useful technique for inserting output from other applications into your own programs. For example, to produce a 1992 calendar in an empty window, choose Command in the Utilities menu, enter |
![]() cal 1992
cal 1992
| in the panel that appears, and press Return. The output appears in an untitled window.
If instead you wanted the calendar to appear in the main window, position the insertion point where you want the calendar to appear (or select what you want it to replace). Then choose Pipe in the Utilities menu. Enter the same command as before and press Return. This time the output appears in the main window at the insertion point or in place of the current selection. You can also use the Pipe command to manipulate the current text selection with another UNIX program. If the command accepts input, the selection will be used as input--for example, you could sort the selection with the sort command. If there are Command and Pipe commands that you use frequently, you can define them as menu items in the User Commands and User Pipes submenus in the Utilities menu. To do this, enter a definition for each command in a file named .commanddict or .pipedict in your home folder. Each command definition contains at least two fields, separated by tabs:
For example, the following entry defines a Pipe command called Sort Selection, which runs the UNIX sort command using the current selection as input: |
| Sort Selection | sort - |
| One additional field (inserted between the two required fields and separated from them by tabs) can be used to specify a keyboard alternative for the command. For example, this definition of the Sort Selection command assigns to it the keyboard alternative Command-5: |
| Sort Selection | 5 | sort - |
| If you make changes to your .commanddict or .pipedict file while Edit is running, you must quit and restart Edit in order for your changes to appear in the User Commands or User Pipes menu.
Two special variables can be used as arguments to the UNIX commands you specify: |
| $file | This refers to the file that's displayed in the main window (which may be different from the contents of the window). | |
| $selection | This refers to the contents of the current selection, which can be either text that's selected in a file window or a file that's selected in a folder window. |
| Here are some examples of how these variables might be used in a .commanddict definition: |
| Print Two Up | P | enscript -2r $file | |
| GrepAppkit | A | fgrep -n "$selection" /usr/include/appkit/*.h |
| The first example prints the contents of the file that's displayed in the main window. The second example searches for occurrences of the selected text in the Application Kit header files.
Using a Tags File If you're maintaining a large number of files as part of a programming project, you can use Edit's Source command with a tags file to quickly locate the definition of an object in that group of files. A tags file (which you create with the UNIX ctags command) lists the locations of program objects (such as functions, procedures, global variables, and typedefs) that are in a specified group of files. To locate an object definition, simply select it and choose Source (or choose Source and type the object name in the panel that appears). Edit searches one or more tags files for the location of the object definition and then opens the file containing the definition. Normally, Edit searches the tags file in the current folder (the folder containing the file in the main window). However, you can specify other tags files to be searched either with the Preferences command or by specifying the Tags option when starting up Edit from a shell window. More information on tags files is given in the ctags UNIX manual page. For more information on using the Source command, see the command description in "Commands in the Utilities Menu" later in this chapter. |
| Interacting with the GDB Debugger |
| A command named Gdb appears in the Edit main menu whenever you execute the GDB view command (note that view is executed automatically by Project Builder when you ask it to debug a project). |
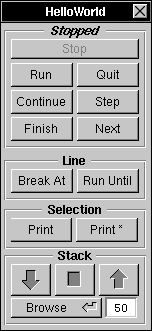 |
| The Gdb command opens the panel shown here, which lets you perform basic debugging operations on a project and its source files. Commands not contained in the Gdb panel can still be accessed by using the GDB debugger directly, as described in Chapter 13.
Since the Gdb command is visible only under certain conditions and has more to do with debugging a project than with editing a document, the Gdb panel is described in the section "Debugging" in Chapter 2, "The Project Builder Application." |
| Edit Command Reference |
| The following sections summarize the menus and commands available in Edit.
Commands in the Main Menu Edit's main menu contains the standard Info, Print, Windows, Services, Hide, and Quit commands. The other commands and the submenus they open are described in the sections that follow. Several standard commands are discussed here only in terms of their particular use in Edit.
Commands in the File Menu Edit's File menu contains the standard Open, New, Revert to Saved, and Close commands. The other commands are described here. |
| Command | Description | |
| Save, Save As, Save To, | These are the standard commands for saving the contents | |
| Save All | of the main window on the disk. | |
| When you save a file, Edit first moves the contents of the old version to a temporary backup file, which has the same name as the previous file but with a tilde (~) appended to it (for example, the backup file corresponding to Fruit.m would be Fruit.m~). Next, Edit writes the new version of the file and then it (normally) deletes the backup file. If something happens that prevents Edit from saving the file, however, the backup file remains so you can recover its contents. Or, if you always want the backup file to remain (even after the new version is successfully saved), you can set the "Don't delete backup file" option in the Preferences panel. | ||
| While the file is being saved, "saving:" appears before the file name in the title bar of the window (in the case of small files, it appears only for an instant). Until "saving:" has disappeared, don't use the file (for example, don't try to compile or copy it). | ||
| Open Selection | Opens the file or folder currently selected in the main window. Normally, you use this command on a selection in a folder window. However, it also works on selected text in a file window. The selected text must be either a full pathname, or a file name or pathname relative to the current folder (the folder containing the file in the main window). | |
| Open Folder | Displays a panel in which you enter the pathname of a folder to be opened. When you click OK, the folder opens in an Edit folder window. When the panel appears, Edit displays the name of the current folder in the "Folder name" field. |
| Commands in the Edit Menu
Edit's Edit submenu contains the standard Cut, Copy, Paste, Delete, and Select All commands, plus commands for opening the Link menu and the Find menu described below. Other commands are described here. |
| Command | Description | |
| Undelete | Reinserts the most recently deleted text, even if the text hasn't been put on the pasteboard. You can insert the deleted text at a new location by positioning the insertion point where you want to insert the text (or selecting text that you want it to replace) and then choosing Undelete. | |
| Spelling | Opens the Spelling Panel for checking the spelling of words in the main window. See "Checking Spelling." | |
| Check Spelling | Has the same effect as clicking Find Next in the Spelling panel--that is, it finds the next word not contained in the spelling dictionary. See "Checking Spelling." |
| Commands in the Link Menu
Edit's Link menu provides the following commands for working with linked documents. For more information, see "Adding Linked Graphics." |
| Command | Description | |
| Paste and Link | Pastes a copy of a graphic contained on the pasteboard, but creates a link to the document that the graphic came from, so that future changes to the original graphic will affect the copy in the Edit document as well. | |
| Show Links, Hide Links | Shows (or hides) whether or not graphics are linked by displaying a linked chain around the border of each linked graphic. | |
| Link Inspector | Opens the Link Inspector panel. |
| Commands in the Find Menu
Edit's Find menu contains the standard Find Panel, Find Next, Find Previous, and Enter Selection commands. Other commands are described here. |
| Command | Description | |
| Jump to Selection | Scrolls the insertion point or current text selection into view. | |
| Line Range | Opens a panel that identifies by number the line or line range containing the current selection in the main window. If the Character option in this panel is selected instead of the Line option, then the character range is displayed instead of the line range. | |
| You can also use the panel to search for a particular line, line range, character, or character range in the main window. Enter a number or a range (a range is two numbers separated by a colon) in the Range field. Click the Select button to select that character, line, or range of the file. |
| Commands in the Format Menu
The Format menu contains commands for displaying the standard Font and Text menus, as well as Edit-specific Help and Structure menus. Commands on these menus are described later in the sections that follow. |
| Command | Description | |
| Page Layout | Displays the standard Page Layout panel for choosing among various paper sizes, scaling factors, and orientations for text printed from the main window. | |
| When you print text that's displayed in a window, the printed words wrap exactly as they're wrapped on the screen. Therefore, if you change the page layout, the width of the window may also need to be changed in order for the text to print correctly. Changing the page layout doesn't affect the size of the main window, so you'll need to make this adjustment. |
| Commands in the Font Menu
The Font menu contains the standard Font commands, plus a few additional commands that let you change the font properties of the text displayed in the main window--for example, the Colors command opens the standard Colors panel, which you can use to change the color of the selected text. In an RTF file, font changes apply to the current selection and are saved when you save the contents of the window. In an ASCII file, font changes are applied to the entire contents of the main window--font changes in non-RTF files aren't saved when you save the contents of the window.
Commands in the Text Menu Edit's Text menu contains commands that let you change properties of the text displayed in the main window. Some of these commands work only on text in RTF files; use the Make Rich Text command if you want to change the contents of the main window from ASCII to RTF. |
| Command | Description | |
| Align Left, Center, | These align the text with the left margin (ragged right), | |
| Align Right | center it between both margins, or align it with the right margin (ragged left). | |
| Make Rich Text, | Changes the format of the text in the main window from | |
| Make ASCII | RTF to ASCII, or vice versa. In an RTF file, font changes and other text properties (such as superscripting and subscripting) can be saved as part of the file and displayed along with the text. | |
| Nest, Unnest | These help you indent blocks of program code. Select the program lines you want to indent and then choose Nest. Each line in the selected program text will be indented the default amount (four characters, unless you've specified a different default value in the Preferences panel or overridden the default when you started up Edit from a shell window). | |
| Unnest moves the selected lines the default number of characters to the left, thus counteracting the effect of Nest. |
(continued)
| Command | Description | |
| Show Ruler, Hide Ruler | Show Ruler displays a ruler at the top of the main window, and the Hide Ruler command removes it. With this ruler you can set margins, tabs, and paragraph indentation. See "Using the Ruler" for details. | |
| Copy Ruler, Paste Ruler | Copy Ruler copies the ruler settings of the paragraph containing the insertion point or the beginning of the current selection, so that you can subsequently paste them with Paste Ruler. It's as though there's a separate pasteboard for the ruler, and Copy Ruler replaces what's already on it, just as Copy does for text. | |
| Paste Ruler affects the paragraph containing the insertion point or the current selection. It replaces the paragraph's ruler settings with the last ones you copied with Copy Ruler. If the current selection spans more than one paragraph, Paste Ruler replaces the ruler settings of all the selected paragraphs. | ||
| These commands don't require the ruler to be showing, and they don't change the contents of the pasteboard. |
| Commands in the Help Menu
The Help menu provides the following commands, which are used to add or edit Help links. Note that although Help links are designed for use within an application's on-line Help system, they can also be used more generally (for example, the Contents file for the on-line developer release notes contains links to the various release note files). For more information about working with Help links and markers, see "Adding Help Links." For information about adding a Help system to an application you're developing, see Chapter 3. |
| Command | Description | |
| Insert Link | Inserts a Help link at the insertion point in the main window. | |
| Insert Marker | Inserts a Help marker at the insertion point in the main window. | |
| Show Markers, | Shows (or hides) all the markers in the main window. | |
| Hide Markers |
| Commands in the Structure Menu
The Structure menu provides commands that control whether certain portions of the text in the main window are expanded (that is, visible) or contracted (that is, hidden). These commands are useful for working with files that have a regular multilevel structure, in which the various levels of structure are represented by varying degrees of indentation (for example, an outline or Objective C language source code). See "Contracting and Expanding Text in a File Window" earlier in the chapter for a detailed introduction to this Edit feature. |
| Command | Description | |
| Contract All, Expand All | These contract or expand all the text in the main window. | |
| Contract Sel, Expand Sel | These contract or expand the selected text in the main window. |
| Commands in the Utilities Menu
Commands in the Utilities menu perform a variety of functions, such as providing an interface to the UNIX shell and looking up information in a UNIX manual page. There are also two customizable submenus--User Commands and User Pipes--to which you can add commands that you've defined yourself. |
| Command | Description | |
| Command | Displays a panel in which you specify a UNIX command to be executed. The output of the command appears in a window titled UNTITLED, rather than in the main window. | |
| Two variables can be used as arguments to the UNIX command you specify: | ||
| $file refers to the file that's displayed in the main window. | ||
| $selection refers to the contents of the current selection, which must be single file specification (wildcards can be used). Normally this will be a file that's selected in a folder window. |
(continued)
| Command | Description | |
| User Commands | Displays a menu of commands you've defined and saved in a file named .commanddict in your home folder. Any changes you make to the .commanddict file don't take effect until the next time you start Edit. The .commanddict file format is described in "Piping UNIX Output to a File" earlier in this chapter. | |
| Pipe | Works the same as Command, with one important difference: The output of the UNIX command that you specify isn't displayed in another window--instead, the output (including any error messages that might be generated) appears in the main window at the insertion point or in place of the current selection. | |
| User Pipes | Displays a menu that contains pipe commands you've defined and saved in a file named .pipedict in your home folder. These commands may be similar to commands you define in the User Commands menu, but the output appears in the main window at the insertion point or in place of the current selection, rather than in a separate window. | |
| The .pipedict file format is described earlier in "Piping UNIX Output to a File." | ||
| Source | Opens the file containing the definition of the program object (such as a function, procedure, global variable, or typedef) selected in the main window. This command searches one or more tags files for the location of the object definition and then opens the file containing the definition. Normally, Edit searches the tags file in the current folder (the folder containing the file in the main window). However, you can specify other tags files to be searched either in the Preferences panel or when starting up Edit from a shell window. | |
| To locate an object definition, select the function name, macro, or other program object in the file you're working in and choose Source. Edit opens the file containing the required information and highlights the first occurrence of the object in the text. If you choose Source without selecting text, Edit displays a panel that prompts you to enter the program object you want defined. If Edit can't locate the object, it informs you that no such tags file entry for the object exists. (If this happens, use the Preferences command to make sure that the pathname of the tags file listing the location of the object is specified.) | ||
| A tags file is a file you create with the UNIX ctags command. The file lists the locations of specified program objects (such as functions, procedures, global variables, and typedefs). More information on tags files is given in the ctags UNIX manual page. | ||
| Manual | Displays a UNIX manual page in an Edit window. First select the manual page subject in the main window and then choose Manual. If there's no selection, a panel appears prompting you for an entry. | |
| Match | If you select one of a matching pair of delimiters (parentheses, braces, or square brackets) and choose Match, the pair of delimiters and the enclosed text become selected. You can also invoke this command by double-clicking either of the delimiters. |
| Commands in the Expert Menu
The Expert menu provides the following advanced commands. |
| Command | Description | |
| Update Folder | Updates the contents of the main window, which must be a folder window. Folder windows aren't automatically updated, so this command is useful when files in a folder have been created, deleted, or renamed. | |
| Copy PS | Copies the contents of the main window onto the pasteboard as an Encapsulated PostScript (EPS) image. Once pasted into an application that accepts EPS images, the pasted copy of the text can no longer be edited. | |
| Expansion Dictionary | Opens the Expansion Dictionary panel for managingtext expansion definitions. See "Using Templates" for a complete description of this panel. | |
| Insert Field | Creates a new field in an expansion template. See "Using Templates." | |
| Next Field | Moves the insertion point to the next field in an expansion template. See "Using Templates." | |
| Close Ancestors | Closes all Edit windows associated with each folder that's neither the main window's folder nor one of its subfolders. | |
| Close Descendants | Closes all Edit windows associated with each folder that's a subfolder of the main window's folder. If the main window is a folder window it will remain open, but if the main window is a file window it will be closed as well. |